Once all items have been created and the components added, you need to manufacture the items to create the stock level for them.
This is done by creating a batch, adding items to the batch then manufacturing the batch. Any items added to the batch will be manufactured.
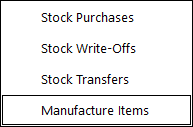
To create a batch and manufacture items in the batch, go to Transactions > Stock Control > Manufacture Items.
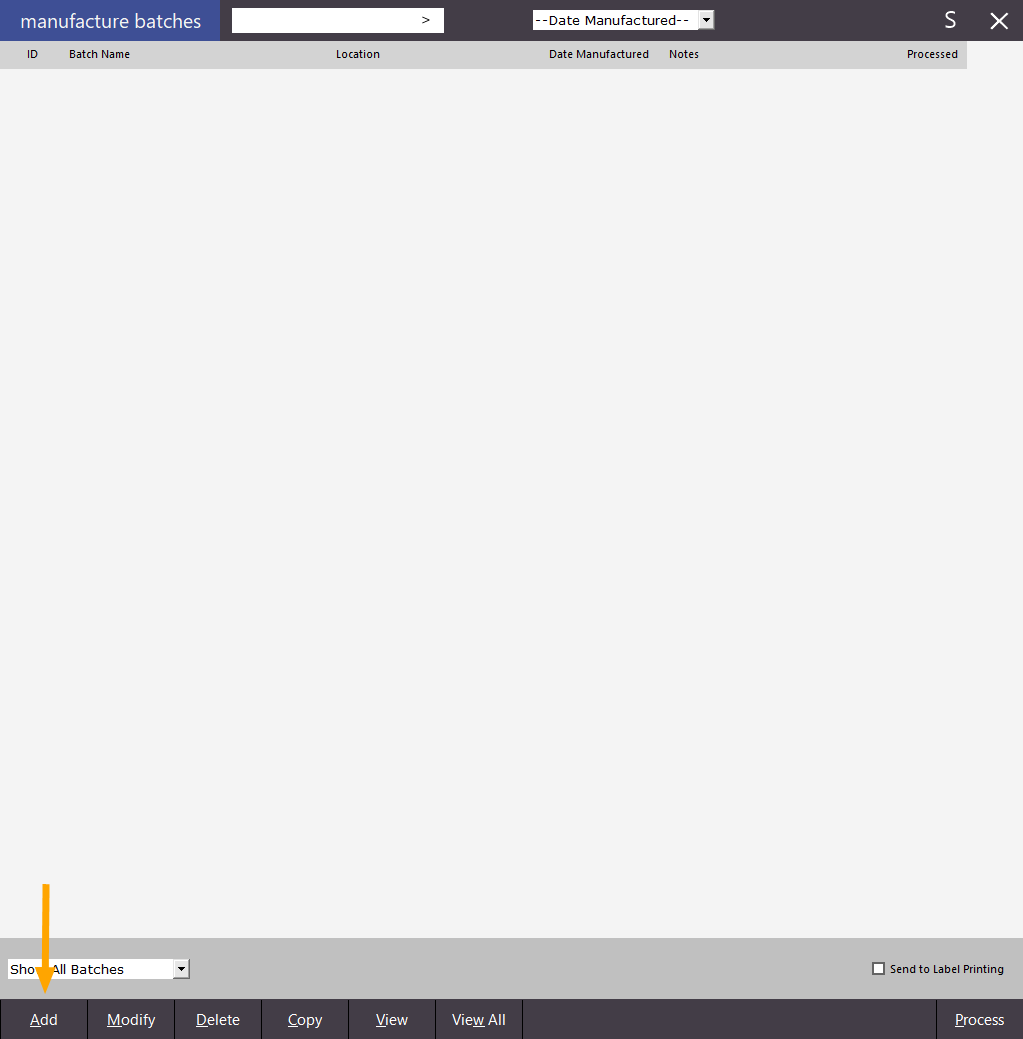
Press the Add button located at the bottom left corner of the screen to create a new manufacture batch.
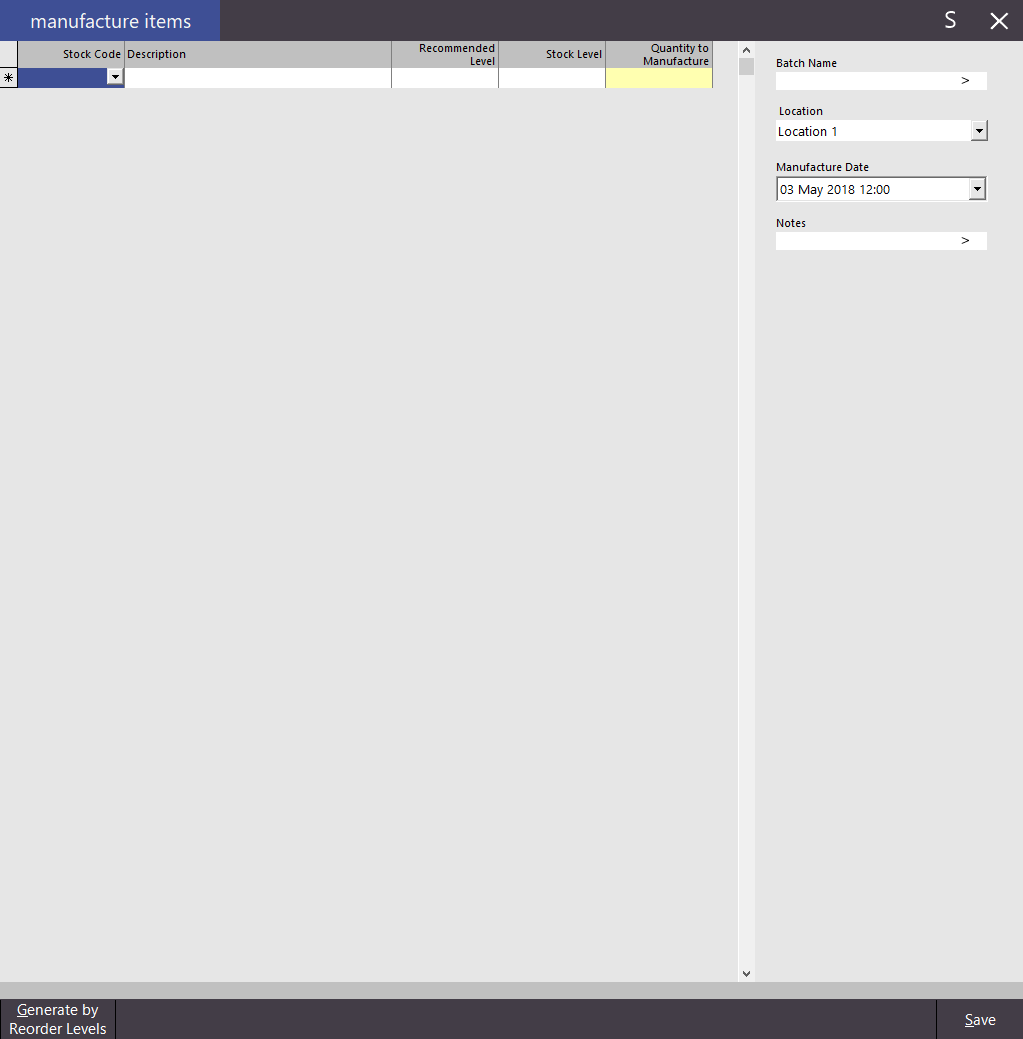
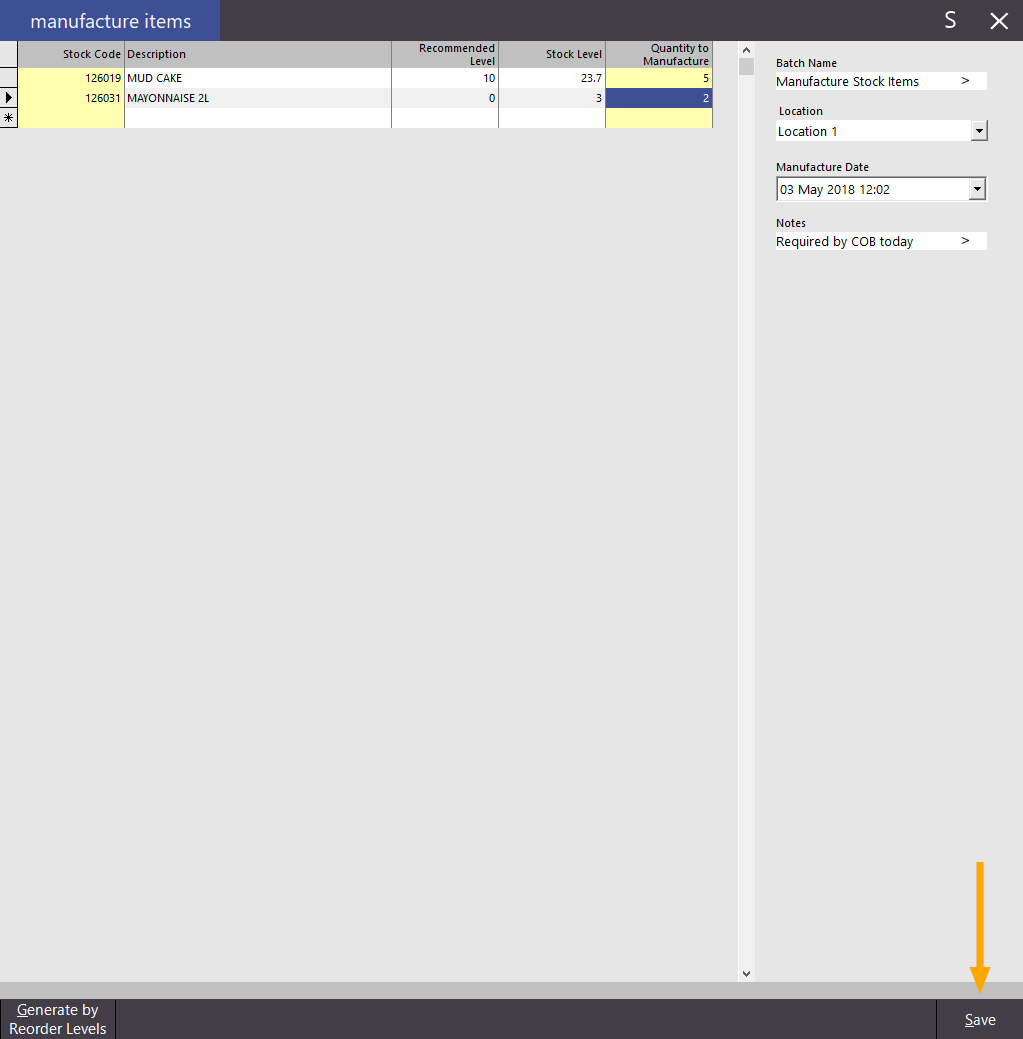
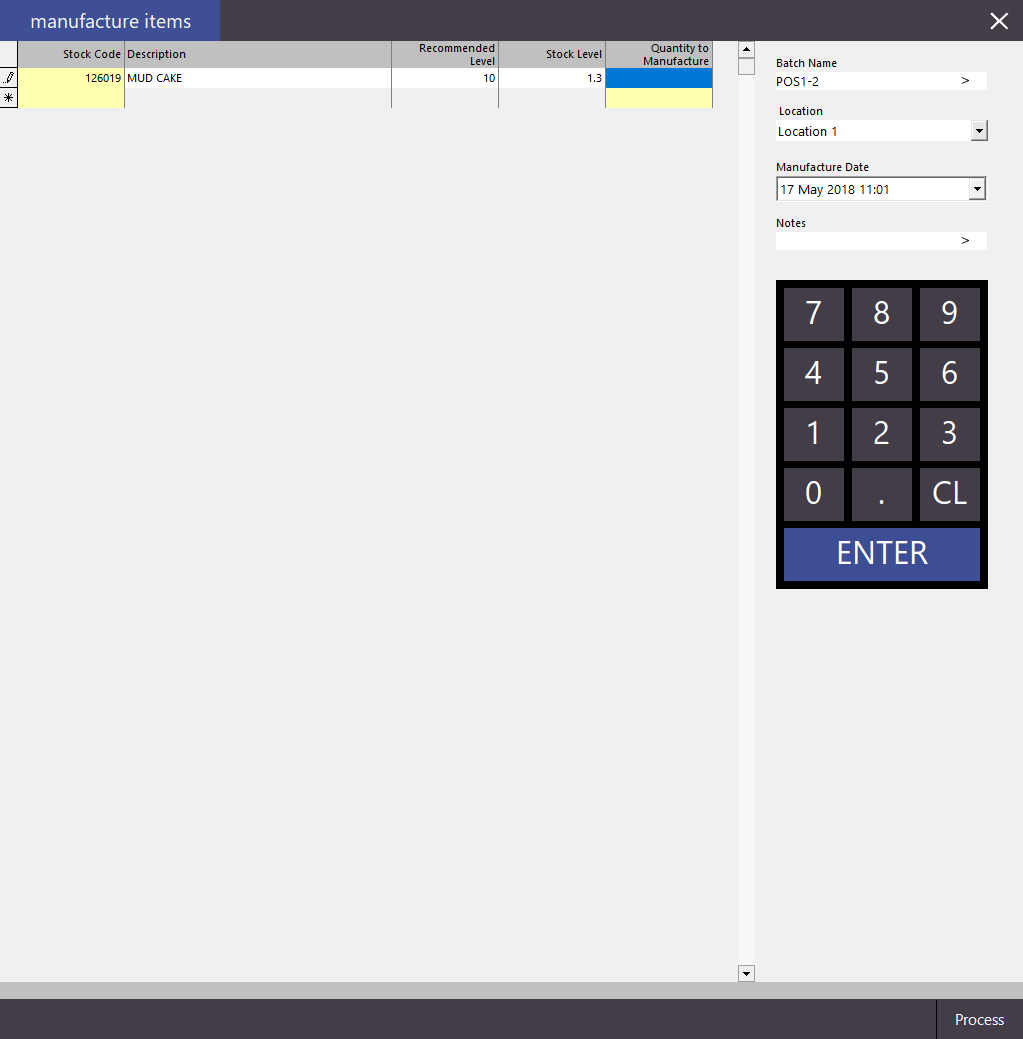
The Manufacture Items screen will open.
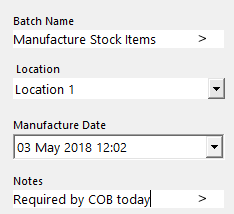
Select the Location for which you want to manufacture the Stock Items, enter a name for the Batch by filling out the Batch Name field, select the Manufacture Date and enter the Notes for the manufacture batch.
Items can be added to the batch automatically by pressing the Generate by Reorder Levels button.
Using the Generate by Reorder Levels button will automatically add any Stock Items that have a Stock Level which is below the recommended level.
When using the Generate by Reorder Levels, the Quantity to Manufacture for each item will also be automatically filled to increase the Manufactured Stock Item's Stock Level to the recommended level. Note that pressing the Generate by Reorder Levels button will clear any existing Stock Items that have been added manually to the current batch.
Items can be added to the batch manually by pressing the Add button located at the bottom left corner of the screen to add the Stock Items to the batch that you want to manufacture.
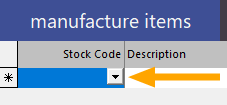
To add a Stock Item to the batch, click on the small dropdown arrow in the Stock Code column.
This will then display the Stock Items screen. Only Manufactured Stock Items will be visible.
Select a Manufactured Item by clicking on it, then press the OK button to add it to the batch.
Alternatively, double-click on the Stock Item from the list and it will be added to the batch.
After the Stock Item has been added to the batch, you will return to the Manufacture Items screen and the Stock Item listed in the batch.
You may now enter the quantity to manufacture for the Stock Item.
If any further Stock Items need to be manufactured in the batch, repeat the process by selecting the next available line in the list then click the small dropdown arrow in the Stock Code column.
Select the next Stock Item that you want to add to the manufacture batch.
Then enter the quantity to manufacture for the Stock Item.
Once you have added all Stock Items that require manufacturing, press the Save button located at the bottom right corner of the screen.
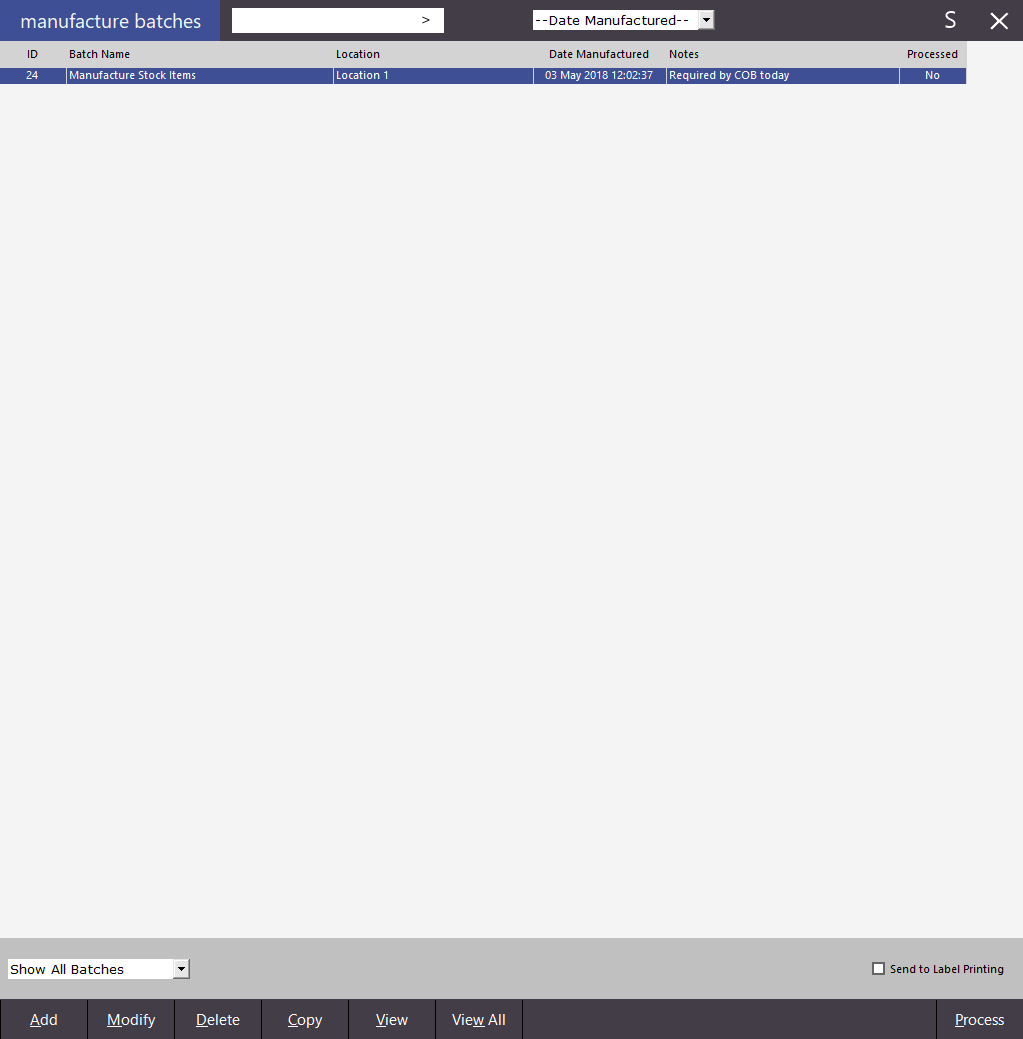
After pressing Save, you will be taken back to the Manufacture Batches screen and the batch that was saved will appear in the list
There are numerous operations that can be performed within the Manufacture Batches screen.
These include Adding new batches, Modifying items within an existing batch, Copying a batch, Viewing the selected batch as a report, Viewing all batches or Process the selected batch.
Now that the batch has been created, you can process it immediately by pressing the Process button located at the bottom right corner of the screen or you can print off a report to give to the Kitchen.
To view the batch as a report, ensure that you select the batch on the Manufacture Batches screen, then select the 'View' button which is located at the bottom of the screen.
The report will be displayed and can be printed then supplied to the Kitchen.
As the Kitchen manufactures each of the items in the list, they may tick them off on the report.
Once the Kitchen has marked off the Stock Items as manufactured, they can then hand the report back to the person in charge, ready for them to finalise the manufacturing process.
To finalise the manufacturing process and to update the stock levels of the Stock Items, return to the Manufacture Batches screen (Transactions > Stock Control > Manufacture Items) then select the batch that you want to process from the list.
Now press the Process button on the bottom right corner of the screen to process the Manufacture Batch
A confirmation prompt will be displayed asking if you are sure you wish to process this manufacture batch.
Press 'Yes' to proceed with processing
The following prompt will be displayed which indicates that the items have been manufactured successfully
After a batch has been processed, it will remain in the Manufacture Batches screen and it's Processed status will change from No to Yes which will indicate that it has been processed (items within the batch have been manufactured and their Stock Level has been increased and any indirect items that are used to manufacture the item have had their stock levels decreased).
The Manufacture Batches screen has various features to facilitate searching for manufactured batches.
Batches can be searched by name, filtered based on a pre-selected period (e.g. This Week, This Month, This Year, Last Week, etc.) and filtered based on their processed status (Show All batches, Unprocessed Only or Processed Only).
If a batch hasn't been processed yet, it can be modified and additional Manufactured Items can be added to the batch. Once a batch has been processed, it can no longer be modified.
When processing a batch, all manufactured items in the batch will have their component items' stock levels withdrawn at that time.
As the items are sold, the quantity will withdraw from the manufactured items stock level.
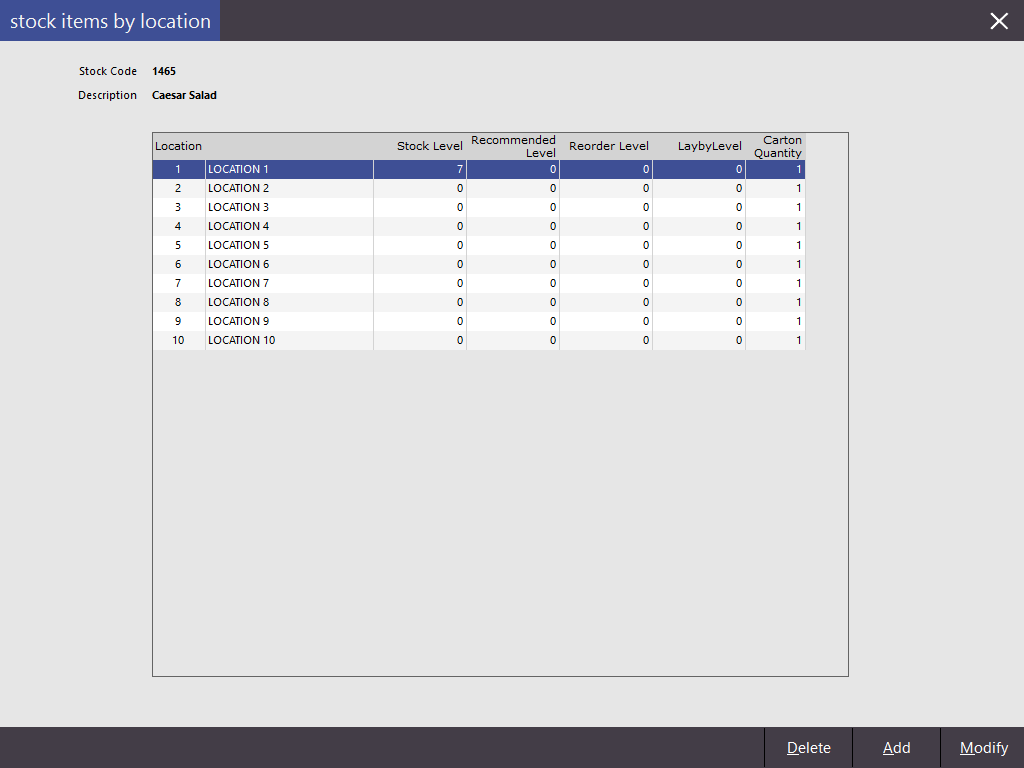
Go to File > Stock Control > Stock Items > Highlight > Locations > Stock Items by Location will show how many of the manufactured item is located in each location.
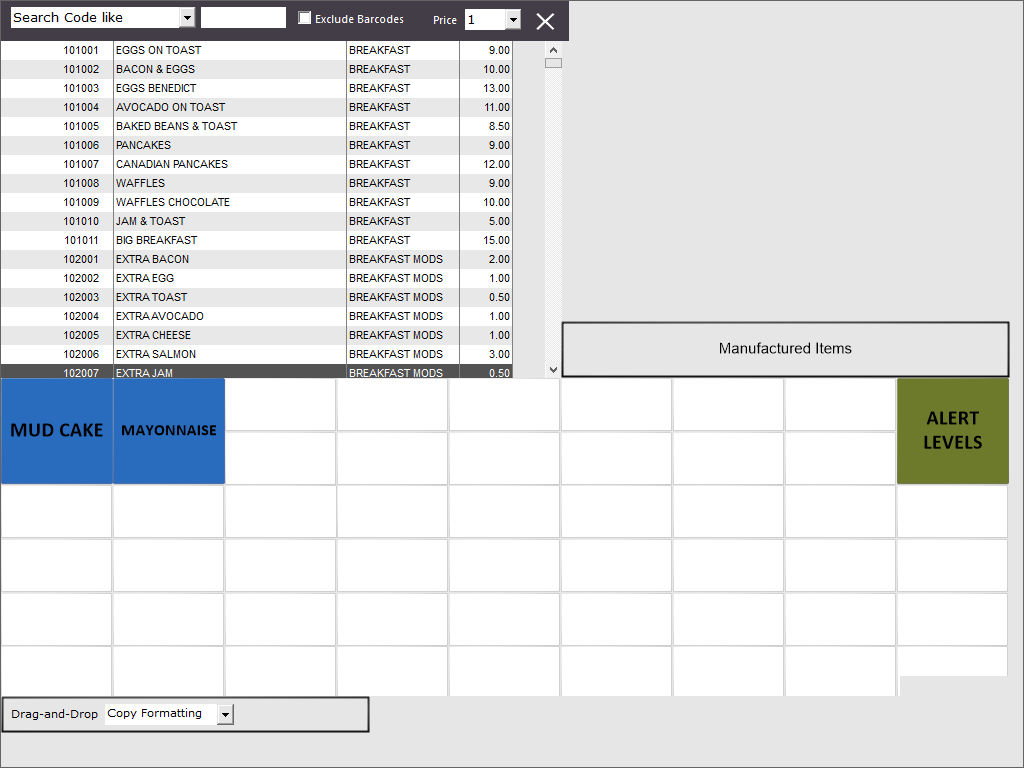
The Manufacture Batches function can now be set as a back-office shortcut, which can then be used to create a button on the POS Screen. You can if required, create a POS Screen grid with all the Manufactured items in your database. These items can have an alert level placed on them, so you can easily see what needs to be manufactured and action it right away. You need to have a POS licensed to the use the back-office functions. You cannot use these on a terminal only licensed to use the POS screen.
Go to Transactions > Stock Control > Manufacture Items > Add button > S button at the top right for Back Office Shortcut.
Go to Setup > POS Screen > Grids > Add > Description: Manufactured Items > Save > Items > Add Manufactured Items to the grid using Back-office Shortcut function.
Add > use Back-office Shortcut function > Alert Levels. This will allow you to change the alert levels on the fly from the POS Screen while manufacturing items.
Create a button on the POS Screen for the POS Screen Grid (Manufacture Items).
When you view the items within the grid, the alert levels will display on the button.
Press any of the items and you are able to manufacture more of that item.
Enter the quantity you want to manufacture and press Process.
The value for the alert level on the buttons will change.